How is a Media Wall Built? A Step-by-Step DIY Guide
Ever dreamed of turning your telly into a showstopper? A media wall is built by planning the layout, managing cables, mounting screens, and integrating tech—often around a stunning Media Wall Fire. Want yours sleek, smart, and sizzle-worthy? Stick around for the how-to magic (without frying your fuse box).
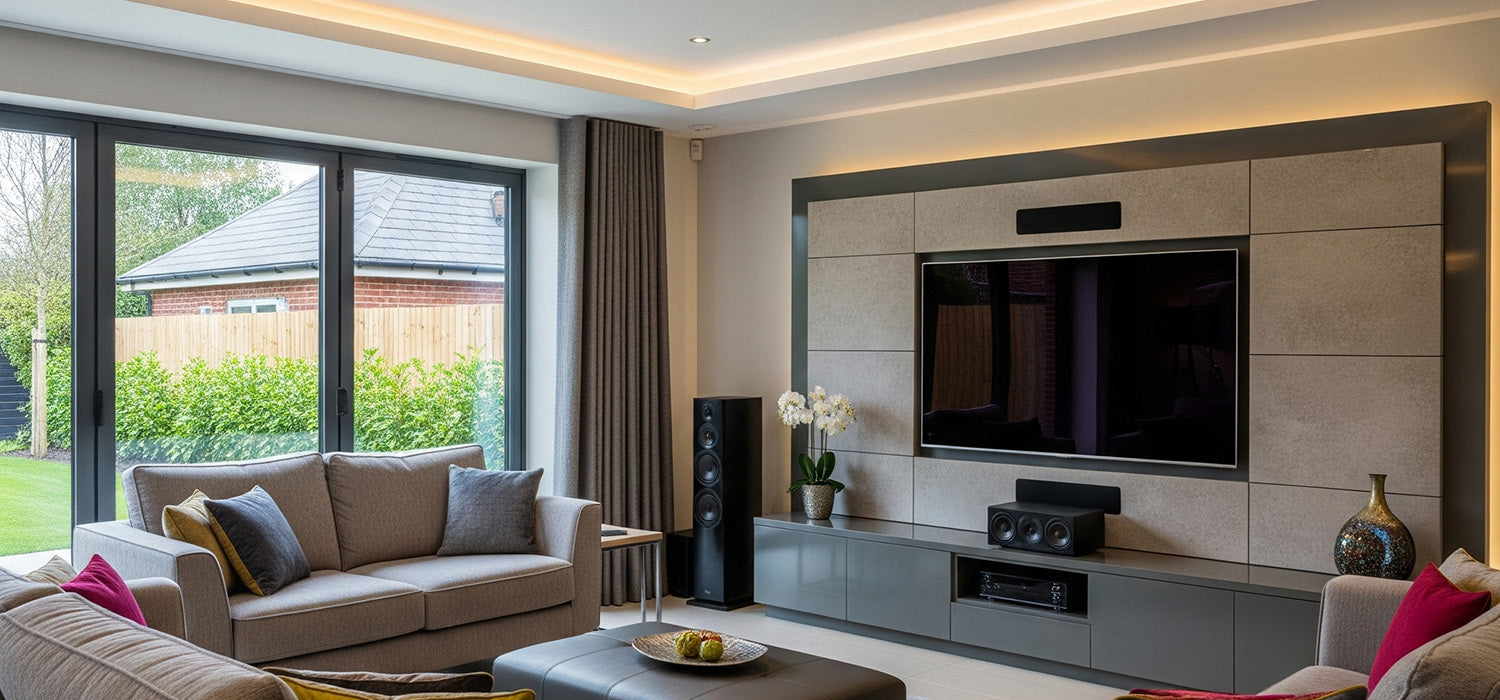
The Core Components of Any Media Wall
Building a media wall isn’t just about popping a TV on a stand and calling it a day. It’s about creating a statement piece—part storage, part cinema, part stylish backdrop—that transforms your living space.
Think of it like a layered cake: there's a solid skeleton, a skin, some clever wiring, and a pretty finish. Here's what goes into it.
The Frame/Structure (Skeleton)
This is the backbone of your wall. If you get this wrong, nothing else matters—so it's worth doing properly.
Timber (Wood) Framing
Timber is popular for DIY builds. It's easy to cut, screw into, and adjust as you go. Perfect for when plans change mid-build (as they often do).
Plus, if you're working around existing features like skirting or coving, timber’s forgiving nature helps it slot in nicely.
Metal Stud Framing
Metal studs offer a cleaner, straighter finish and are less likely to warp—especially in humid conditions. They're lightweight and fire-resistant, which is handy if you're building around a Media Wall Fire.
Professionals often favour metal for its precision, but it can be a faff for first-timers.
The Facing Material (Skin)
Once the skeleton is up, it needs covering—just like wrapping a gift.
Plasterboard
This is the go-to for a smooth, paintable finish. It’s cost-effective, readily available, and easy to skim.
Great if you're after a crisp, modern look.
MDF (Medium Density Fibreboard)
MDF offers a super-smooth surface that’s ideal for painting. It's slightly heavier but brilliant for detailed finishes like grooves or panelling.
Plywood/Other Panels
Plywood might not be your first thought, but it's sturdy and useful for reinforcing behind heavy brackets. You may not see it—but you’ll definitely feel the benefit when the telly’s up.
Internal Elements
Here’s where the clever bits live—those features that make a media wall more than just a wall.
TV Recess and Mounting Reinforcement
Build a snug nook for the telly and reinforce it well. This keeps the screen flush with the wall and prevents unwanted wobble (or worse—cracks!).
Use thick ply or extra studs to make sure it stays rock solid.
Shelving and Cabinetry
Whether it's open shelves for books or closed cabinets to hide the clutter, storage matters. Match it to your room style—think modern, Scandi, or classic shaker.
Cable Management Channels
Nobody wants cables dangling like spaghetti. Trunking and conduit keep things neat and safe.
Plan for extra ports and access—it’ll save headaches later.
External Finishes
Now for the icing on the cake—the part everyone sees.
Paint, Veneer, Trim
Go bold with charcoal grey, keep it calm with off-white, or get fancy with wood veneer. Add LED strips, trims, or skirting for a high-end finish.
Phase 1: Planning and Design
Don’t touch a saw just yet—good media walls start with great planning.
Initial Consultation and Vision (If Professional)
Got big dreams but no idea where to start? Bring in the pros. A designer can take your Pinterest mood board and turn it into actual plans.
They’ll also catch potential issues before they become expensive mistakes.
Detailed Measurements and Layout
Measure everything—from floor to ceiling, wall to sofa. Think about where you sit and what you’ll actually see.
No one wants a cricked neck because the TV’s too high!
Material Selection and Budgeting
Choose wisely. MDF might be cheaper than hardwood but still looks great painted.
Don’t forget extras like paint, filler, and those hidden screws—they all add up.
Incorporating Utilities (Electrical, Ventilation, Fireplace)
Planning a Media Wall Fire or fancy sound system? You’ll need electrics, ventilation, and maybe even Wi-Fi cables wired in. Best get a sparky involved early.
Phase 2: Building the Structural Frame
Let the fun begin—it’s time to get building.
Preparing the Existing Wall and Floor
Clear the area and check the wall’s condition. Mark out stud positions and ensure your floor is level.
It’s dusty work—dust sheets are your best mates here.
Constructing the Base (Plinth) and Side Supports
The base supports everything, so build it like a tank. Side supports frame the wall and define its shape.
Use a spirit level. Every time.
Creating the TV Recess and Internal Niche Frameworks
Measure your TV (including ventilation space) and build a perfectly sized nook. Add framing for shelves or soundbars.
Test-fit everything before moving on.
Reinforcing for Heavy Items (TV, Shelves)
Double-up studs behind where the telly or any heavy units will go. You’ll thank yourself when mounting.
Or more importantly, when it stays mounted.
Phase 3: Integrating Services and Internal Features
This is the wiring phase—essential but often overlooked.
Roughing in Electrical Cables and Sockets
Run your power and HDMI cables through the frame. Think about what you’ll connect—consoles, lights, speakers?
Add a couple of extra sockets—you'll use them.
Installing Cable Management Solutions (Conduits, Trunking)
Keep it neat with conduits or cable trays. Colour-code if you’re feeling fancy.
Future You will love you when you’re adding a new device.
Adding Ventilation for Electronics or Fireplaces
Tellys and fires give off heat. Add discreet vents or leave gaps so everything stays cool.
Your gadgets (and your electric bill) will thank you.
Phase 4: Applying the Facing Material
Time to wrap your frame up nice and tidy.
Cutting and Attaching Plasterboard or MDF Panels
Measure twice, cut once. Fix panels with screws or adhesive depending on your wall type.
Work from the centre out to avoid gaps.
Ensuring Flush and Secure Fastening
Use a level, tap the boards gently into place, and check for any proud screws. It should look neat before you even paint.
Preparing for Joints and Corners
Reinforce corners with beads, tape joints, and fill in any gaps. The smoother the prep, the better the finish.
Phase 5: Finishing and Detailing
This is when it finally starts to look like the vision in your head.
Plastering, Jointing, or Filling Seams
Skim with care. Don’t rush—bumps and lumps show up under paint.
Let each coat dry fully before sanding.
Sanding and Priming Surfaces
Start with coarse, end with fine. Then prime it all to get that velvety smooth surface.
Use a mask—no one wants lungs full of plaster dust.
Painting, Varnishing, or Applying Chosen Finish
Pick colours that work with your furniture. A deep green or midnight blue can look luxurious with the right lighting.
Or keep it neutral and let your telly do the talking.
Installing Trim, Skirting Boards, and Beading
Add those final touches—trim around the TV, skirting at the bottom, maybe some LED strip lighting behind the screen.
It’s the cherry on top.
Phase 6: Final Installation
We’re nearly there. Time to bring in the tech.
Mounting the TV Bracket and TV
Screw the bracket into reinforced studs. Grab a friend for the lift—flat-screens aren’t featherweights.
Check it's level before you let go!
Installing Shelves, Doors, and Drawer Runners
Slot in shelves, fit doors snugly, and test runners. Adjust until everything glides.
Soft-close hinges add a premium touch.
Connecting and Organising Cables
Plug it all in, test every port, and neatly bundle excess cable behind panels or inside trunking.
And breathe—it’s almost time for popcorn.
Professional vs. DIY Construction Approaches
DIY media walls are totally doable with the right tools, patience, and YouTube tutorials. You can save money, and the bragging rights are real.
But pros bring polish. They’ll work faster, make fewer mistakes, and often deliver that "wow" finish right out the gate.
If you're integrating a Media Wall Fire or high-end AV, a professional install may well be worth the cost.
Other content we think you'll love
- Can I Build a Media Wall Myself? A DIY Guide for UK Homes
- How to Build a Stylish Media Wall with TV & Fireplace
- Can You Build a Media Wall Over a Radiator? A Stylish Guide
- Can You Build a Media Wall on Carpet? Tips for a Stable Setup
- Can You Build a Media Wall Around a Fireplace? A Cosy & Stylish Upgrade
- How to Build a Media Wall on a Chimney Breast (UK Guide)
- Can You Build a Media Wall in a Council House? A Practical Guide
- The Ultimate Guide to Buying a Pre-Made Media Wall in the UK
- How to Attach Plasterboard to a Media Wall: A Step-by-Step Guide
- How Deep Should Your Media Wall Be? A Guide to Perfect Fit & Function
- Are Media Wall Fires Safe? What Every UK Homeowner Should Know
- Can You Build a Media Wall Without Plastering?
- MDF vs Plasterboard for Media Walls: Which Should You Choose?
- What Are the Disadvantages of Media Walls? A Cautionary Guide
- What is a Media Wall? The Ultimate Living Room Glow-Up