How to Remove a Wood Stove: A Step-by-Step Guide
Thinking of ditching your old wood stove? Removing it doesn’t have to be a back-breaking, soot-covered nightmare. With the right tools and a little know-how, you can safely remove your stove and make way for a shiny new log burner! Keep reading to learn the how-to and which stove to buy next!
Safety First: Essential Preparations Before Removal
Before you even think about grabbing a wrench, take a step back and ensure you’ve prepped the area properly. Removing a wood stove involves some heavy lifting, so getting the setup right will save you time, hassle, and possibly your back.
Ensuring the Stove is Cold and Ash is Removed
First things first—safety is key. Make sure your stove has been completely cooled down for at least 24 hours. If you’ve just finished using it, now’s the time to put the kettle on and give it time to cool down. Don’t rush this step. If you’ve got any leftover ash, scoop it out, as it will make the stove lighter and less messy to handle.
Gathering Necessary Tools (e.g., wrenches, screwdrivers, gloves)
Now, time to gather your tools. You’ll need some heavy-duty gloves to protect your hands from sharp edges, a dust mask to avoid inhaling soot, and a sturdy pair of shoes to keep your feet safe. For the job itself, grab an adjustable wrench, a socket set, and a screwdriver—nothing too fancy, but you’ll be glad to have them. If the stove is particularly heavy, you might want a dolly or trolley to help with moving it safely. Trust us, this is one job that’s better with some backup!
Disconnecting the Flue Pipe
Next up, you’ll need to disconnect the flue pipe. Most stoves are connected to a flue that leads up to the chimney. Whether it’s a rear or top exit, start by loosening the clamps or screws that are holding the pipe in place. Gently wiggle the pipe free, but be ready for a little dust and debris to fall out—it's part of the process. Have a dust sheet or old blanket on hand to catch any mess.
Protecting the Surrounding Area
Before you start removing the stove, make sure you protect the area around it. Lay dust sheets on the floor and cover nearby furniture with old blankets. The soot and ash can be a nightmare to clean later, so it’s worth the extra effort now. A little preparation goes a long way in avoiding damage to your floors and furniture.
Step-by-Step Guide to Removing a Wood Stove
Once you’re all prepped, it’s time to get to the fun part: removing the stove itself. Keep a calm head, and remember: patience is key here.
Detaching the Stove from the Hearth
Start by loosening any bolts or screws securing the stove to the hearth. This might involve unscrewing the stove legs or removing a metal bracket that holds the stove in place. Take it slow—if the stove feels stuck, give it a gentle wiggle to free it from the hearth. The last thing you want is to rush and damage your flooring.
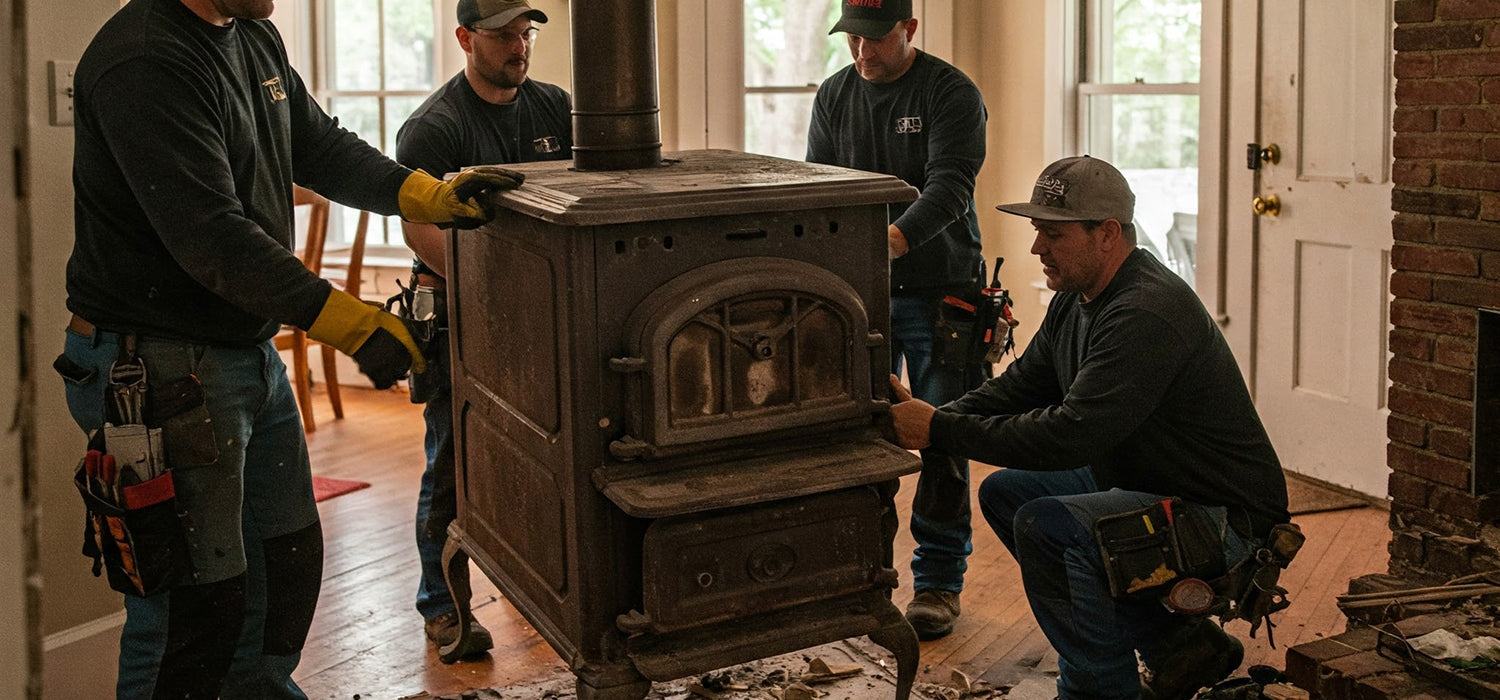
Lifting and Moving the Stove Safely (Consider Weight and Assistance)
Wood stoves are no lightweight. Some can weigh over 100kg, and if you’re not careful, they can end up doing some damage to your back. It’s best to have a friend on hand to help with lifting, or use a dolly or trolley to move the stove. When lifting, bend at the knees and not your back—this isn’t a weightlifting contest! Take your time and make sure everything is secure before you attempt to move it.
Dealing with the Hearth and Chimney Opening
Once the stove is removed, you might be left with a slightly messy hearth and chimney opening. If you’re not installing a new stove straight away, it’s important to seal off the chimney to stop draughts or animals from getting inside. A chimney balloon or a cap will do the trick. As for the hearth, if you’re planning to replace the stove, make sure the area is clear, and check if any repairs are needed to the flooring or wall behind.
What to Do After Removing the Stove
Phew! You’ve removed the stove—now, what’s next? There are a few final touches to make sure the space is ready for whatever you plan to do next.
Inspecting the Chimney
Take a good look at the chimney now that the stove is out. Check for any damage or build-up of soot. If it looks like it needs a good clean or any repairs, now’s the time to do it. A dirty or damaged chimney can be a fire hazard, so make sure it’s in top shape before re-installing a new stove or fireplace.
Sealing the Chimney Opening (if necessary)
If you're not planning on putting a new stove in right away, you’ll need to seal off the chimney to prevent cold air, rain, or wildlife from making their way in. A chimney balloon is a simple way to block off the opening, but if you’re unsure about what to use, a professional can help. You can also get a cap fitted to make sure the chimney is properly sealed.
Responsible Disposal of the Wood Stove
Now that your stove is gone, it’s time to figure out what to do with it. You’ve got a few options: You could sell it if it’s still in good condition, take it to a local scrap yard (cast iron has some good scrap value), or even upcycle it into something fun, like a garden heater. Just don’t dump it! Most stoves can be recycled or repurposed, so find a way to dispose of it responsibly.
Final Thoughts
Removing a wood stove might seem like a daunting task, but with the right preparations and a bit of patience, you’ll have it done in no time. The key is to take things slow, stay safe, and always be mindful of the weight and complexity of the job.
And once the stove is out, you're one step closer to making your space exactly how you want it. Whether you’re planning on installing a new stove, replacing it with a modern electric fire, or just giving the room a fresh look, you’ll be glad you tackled the job safely and efficiently. Ready for your next adventure in home improvement?
Other content we think you'll love
- What Log Burner Do I Need? The Cosy Homeowner’s Guide
- What Log Burner to Buy: The Cosy Homeowner's Guide
- How to Fit a Log Burner (Without Setting Off the Smoke Alarm)
- What Size Log Burner Do I Need? A Simple Guide to Finding the Perfect Fit
- Where to Put a Log Burner: Finding the Perfect Spot for Warmth and Style
- Can You Take a Log Burner When You Move? Here's What You Need to Know
- How to Fit a Wood Burner in a Conservatory
- Log Burner for New Build: What You Need to Know Before You Install One
- Installing a Log Burner Near a Gas Pipe: What You Need to Know
- Log Burner Near Curtains: How Close Is Too Close – And How to Stay Safe
- Can You Use a Log Burner Without a Liner?
- Can You Have a Log Burner with Underfloor Heating?
- Log Burner Distance from Combustibles: Stay Safe and Warm