DIY Media Wall Guide: Build Your Dream TV Feature with Style
Dreaming of a Media Wall DIY that doesn’t end in disaster and drywall dust in your tea? Short answer: Yes, you can totally build one—with style, storage, and even a Media Wall Fire! From smart tools to mood lighting, we’ve got the hacks. Stick around—your Netflix nook awaits.
Your Comprehensive Guide to DIY Media Wall Construction
Is a DIY Media Wall Right for You?
Building a media wall isn’t just about impressing guests—it’s about creating a space that works for you. But first, let’s be honest: are you more “drill and conquer” or “IKEA-almost-broke-me”?
If you’ve got a steady hand and a free weekend, this project is well within reach. If not, don’t panic—you can still manage the design and call in help where needed. A successful DIY media wall starts with knowing your limits and playing to your strengths.
Assessing Your Skill Level and Tools
Do you own a drill that’s not still in the box? Know the difference between a Phillips and a flat-head screwdriver? If yes, you're in decent shape.
You’ll need basic tools—nothing wildly specialist—and a bit of patience. The good news is: you’ll use most of these tools again for future projects, so it’s a smart investment.
Benefits of Building Your Own (Cost Savings, Customisation, Satisfaction)
Let’s face it—media walls can be pricey if you go the bespoke route. But when you DIY, you're not just saving money. You’re creating something that fits your room, your telly, your storage needs—and yes, even your dream Media Wall Fire.
There’s a certain pride in sitting back and saying, “I built that.” And it’s even better when it cost less than your neighbour’s.
When to Consider Professional Help
Electrics. That’s the line in the sand.
If your project involves adding sockets, lighting circuits or wiring for a fireplace, get a qualified electrician involved. It’s safer, smarter, and saves you the worry of accidentally blowing a fuse—or worse.
Planning and Design Phase
Defining Purpose and Features (TV, Fireplace, Storage, Display)
Are you building this as a home cinema hub? Or a sleek statement wall with bookshelves and ambient lighting?
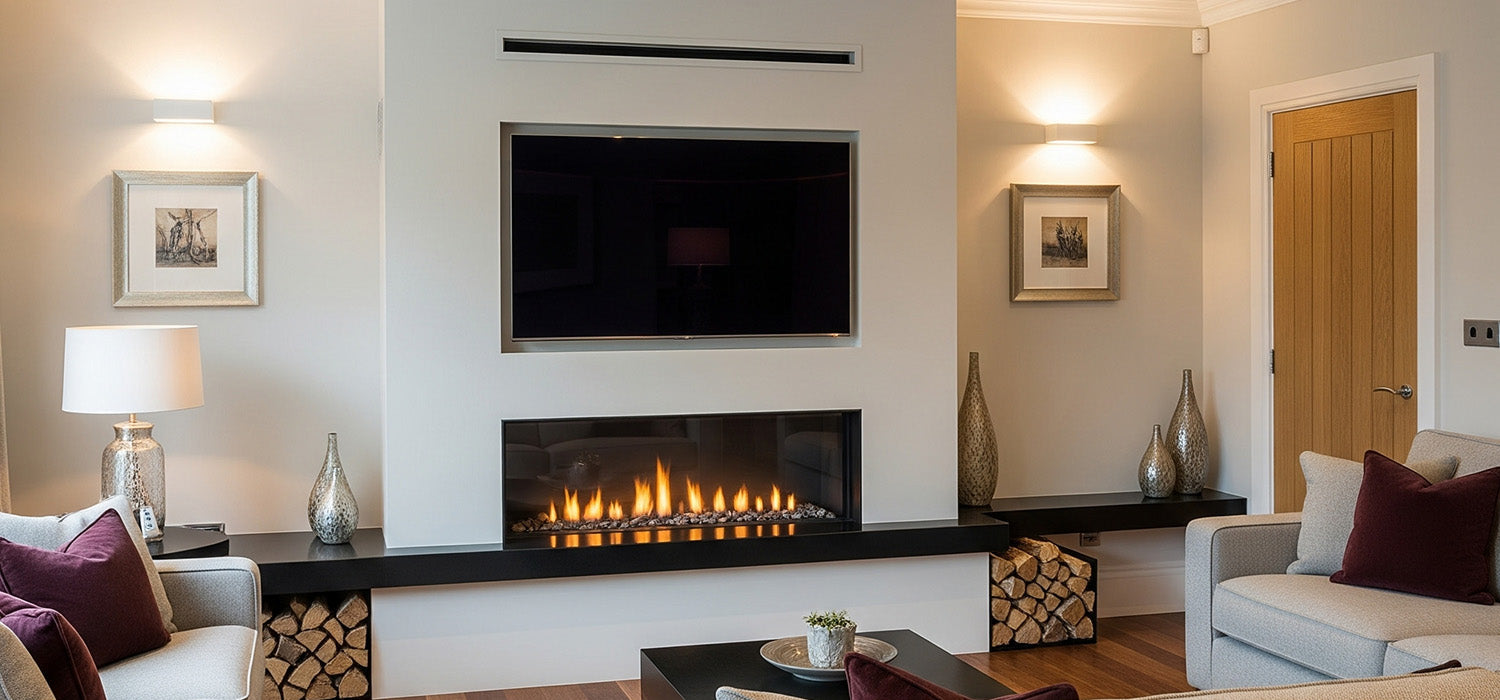
Maybe you're dreaming of a warm Media Wall Fire beneath your TV. Whatever your vision, start by listing your must-haves. Prioritise function first, then layer in the aesthetic.
Accurate Measurement and Layout Sketching
No one wants to drill into a wall only to discover the TV doesn’t fit.
Measure your space carefully. Then sketch your layout—use pencil and graph paper or a digital tool like SketchUp. Mark out the position of the TV, shelves, electrics and any fireplace you plan to include.
Get it down before you build it up.
Material Selection (Timber, MDF, Plasterboard)
Use timber or metal studs for your framework, depending on preference and wall type.
MDF is great for smooth surfaces and shelving, while fire-resistant plasterboard is essential if you're adding a fireplace. Keep it budget-friendly but don’t skimp on safety—especially with electricals or heat involved.
Essential Tools Checklist
Here’s what you’ll want in your toolkit:
-
Cordless drill (with various bits)
-
Spirit level
-
Measuring tape
-
Stud finder
-
Saw (hand or circular)
-
Screwdriver set
-
Pencil and masking tape
Optional but highly recommended? An electric screwdriver and a good cuppa.
Step-by-Step Construction Process
Building the Framework (Timber or Metal Studs)
Start by building the frame using timber or metal studs. Anchor the structure securely into the wall studs and floor for stability.
Use a spirit level to check your lines at every stage. A solid skeleton is key—wobbly frames make for wonky TVs, and no one wants that.
Creating Recesses and Openings (TV, Fireplace, Shelves)
Mark out and frame any cut-outs for your telly, Media Wall Fire, or shelving. If you’re adding a fireplace, double-check the clearances in the manual.
Add extra supports in these areas to handle weight and heat, especially for large screens or electric fires.
Integrating Cable Management Solutions
No one wants visible wires dangling down like jungle vines.
Plan your cable routes early—conduit or trunking behind the plasterboard is a tidy option. Mark each cable’s end with tape labels so you’re not guessing later.
Preparing for Electrical (Sockets, Lighting)
This is the point where your project either shines or shorts out.
Consult an electrician early if you want built-in LED strips, plug sockets, or hardwired features. Have them run cabling before you seal up the wall.
Applying Facing Materials (Plasterboard, MDF)
Once the cables and frame are sorted, it’s time to board it up.
Fix plasterboard or MDF to your frame. Use countersunk screws and keep joins neat. If your fireplace generates heat, double-check your boards are rated for it.
Finishing Touches (Plastering, Sanding, Painting)
This is where it all comes together.
Fill any gaps, sand down rough edges, and give the surface a few coats of paint. Want to go the extra mile? Add trims, panel details or floating shelves for a high-end look.
Installing Your Media Equipment
Secure TV Mounting
Find your centre point and install a heavy-duty mount. Make sure it’s fixed into studs, not just plasterboard.
Always check the bracket’s max weight and follow the TV manufacturer’s guidelines.
Fireplace Installation (if applicable)
If you're including a Media Wall Fire, slot it into the frame and plug it in.
Most electric models are simple to install but still require clearance behind and around. Don’t box it in too tightly—it needs to breathe.
Setting Up Audio and Other Devices
Route your speaker wires, soundbars and consoles into their places.
Label cables, hide power bricks in cupboards or shelves, and use cable ties for a clean finish. The fewer wires on show, the better.
Common DIY Pitfalls and How to Avoid Them
Measuring Errors
An extra 10 minutes double-checking measurements could save hours of rework. Always measure twice and cut once—then measure again for luck.
Neglecting Ventilation
TVs, consoles, and especially fireplaces need airflow.
Build in ventilation gaps or removable panels to allow heat to escape. Overheating is a surefire way to ruin expensive kit.
Inadequate Cable Management
Future-proof your build with more cable space than you think you need. Trust us—you’ll add new devices later.
Structural Instability
Heavy telly? Big fire? Reinforce your frame.
Double up timber where needed, and never rely on drywall alone to hold weight. Safety first.
Achieving a Smooth Finish
Rushed filler jobs stand out like sore thumbs under LED lights. Take your time to sand, fill, prime, and paint. It’s worth it.
DIY Media Wall Project Ideas (Examples and Inspiration)
Budget-Friendly Media Walls (e.g. IKEA Hacks)
Use flat-pack bookcases or units from IKEA to build around. Add moulding and trim to blend it in, and no one will know you spent less than £300.
Feature Wall with Integrated Shelving
Frame your TV with full-height shelves for books, décor or plants. It gives your wall depth—and makes great use of space.
Corner Media Wall Solutions
Tight on room? Design your wall to fit snugly into a corner. Perfect for smaller lounges or odd-shaped rooms.
Final Thoughts
A DIY media wall isn’t just a cool weekend project—it’s a way to bring personality into your space. Whether you’re going all-in with a Media Wall Fire or just want a sleek TV zone, this guide gives you the know-how to build with confidence.
Now grab that drill (and maybe a biscuit), and start making your living room the envy of the street.